Check Web Security pake Nikto

ada bbrp tools untuk checknya, sementara ini gw pake tools namanya Nikto

Cara installnya gampang, kalo mac tinggal

brew install nikto

itu kalo di mac udah keinstall brew ya, kalo belum silahkan cari info instalasi brew di mac

Untuk penggunaanya lebih gampang lagi πŸ™‚

nikto -host alamatserver

Nah ini menariknya, kita compare ya sama web server yang udah diamankan sama belum

ini yang belum diamankan

detanto@detantos-mbp ~ % nikto -host IpAtauNamaServeryangmaudicek
- Nikto v2.1.6
---------------------------------------------------------------------------
+ Target IP:          IpServeryangmaudicek
+ Target Hostname:    HostnameServeryangmaudicek
+ Target Port:        80
+ Start Time:         2020-05-02 00:51:30 (GMT7)
---------------------------------------------------------------------------
+ Server: Apache/2.4.18 (Ubuntu)
+ The anti-clickjacking X-Frame-Options header is not present.
+ The X-XSS-Protection header is not defined. This header can hint to the user agent to protect against some forms of XSS
+ The X-Content-Type-Options header is not set. This could allow the user agent to render the content of the site in a different fashion to the MIME type
+ No CGI Directories found (use '-C all' to force check all possible dirs)
+ Server leaks inodes via ETags, header found with file /resources/img/ico/favicon.ico, fields: 0x47e 0x5817bef6860b4 
+ Web Server returns a valid response with junk HTTP methods, this may cause false positives.
+ OSVDB-3092: /img/: This might be interesting...
+ OSVDB-3092: /login/: This might be interesting...
+ OSVDB-3268: /temp/: Directory indexing found.
+ OSVDB-3092: /temp/: This might be interesting...
+ OSVDB-3268: /database/: Directory indexing found.
+ OSVDB-3093: /database/: Databases? Really??
+ OSVDB-4231: /9MsD6.xml: Coccoon from Apache-XML project reveals file system path in error messages.
+ OSVDB-18114: /reports/rwservlet?server=repserv+report=/tmp/hacker.rdf+destype=cache+desformat=PDF:  Oracle Reports rwservlet report Variable Arbitrary Report Executable Execution
+ OSVDB-3233: /icons/README: Apache default file found.
+ OSVDB-3268: /md/: Directory indexing found.
+ OSVDB-3092: /md/: This might be interesting... potential country code (Republic Of Moldova)
+ OSVDB-3092: /license.txt: License file found may identify site software.
+ OSVDB-3092: /.svn/entries: Subversion Entries file may contain directory listing information.
+ OSVDB-3092: /.svn/wc.db: Subversion SQLite DB file may contain directory listing information. See http://pen-testing.sans.org/blog/pen-testing/2012/12/06/all-your-svn-are-belong-to-us
+ 7566 requests: 1 error(s) and 19 item(s) reported on remote host
+ End Time:           2020-05-02 01:15:27 (GMT7) (1437 seconds)
------------------------------------------------------------------

Ngeri nggak? dengan tools sederhana, server yang belum diamankan ini bisa terekploitasi informasinya sampe sedetail itu.

Nah sekarang ke server yang udah diamankan

detanto@detantos-mbp ~ % nikto -host IpAtauNamaServeryangmaudicek
- Nikto v2.1.6
---------------------------------------------------------------------------
+ No web server found on IpAtauNamaServeryangmaudicek:80
---------------------------------------------------------------------------
+ 0 host(s) tested

Beda kan? Sebetulnya banyak option yang ada di Nikto ini, kapan2 ta bahas

Jadi, gimana dengan servermu? udah secure ato belum? coba deh cek pake tools itu πŸ™‚

Securing Centos

Setelah mencoba bbrp distro, lg mau nyobain centos buat server. Kerennya si centos ini compare to ubuntu menurut aku adalah lebih secure by default. Linux digadang2 sebagai OS yang aman, tapi kalau by default atau istilahnya abis install langsung aman sepengalamanku ya si Centos ini, krn SELinuxnya lgsg keinstall (CMIIW). SELinux adalah Security-Enhanced Linux.

Kenapa tadi dibilang ubuntu by default ga secure? Salah satunya yg ngeganjel ya : kalo ubuntu misal nih abis instalasi, user yang dibuat otomatis jadi sudoers, kalo si Centos sama Debian kaga, SELinuxnya atau semacamnya ndak ada, iptables ga aktif dsb. Malah kalau ngga salah di Debian sudoers itu nggak by default, tapi harus install dulu. Lha Centos ini abis install SELinuxnya udah ada, firewall lgsg aktif dan user yang dibuat belum masuk sudoers.Β Β 

Tapi ya gitu, keamanan tidak berbanding lurus dengan kenyaman, kalau SELinux kita aktifkan, itu juga jadi keribetan sendiri, karena apachenya musti disetting2 ga karuan.

Di artikel ini akan dibahas cara2 mengamankan tapi mengakibatkan ketidaknyamanan pas setting servernya. Instal2 beberapa ga ta bahas ya.

Tambah sudoers :

seperti di linux lainnya, untuk ubah sudoers, harus install sudo, editnya pake visudo. Untuk nambah sudoers ada 2 pendekatan; usernya ditambahkan ke group wheel atau langsung sejajar dengan root. IMHO mendingan ditambahkan ke wheel aja, kecuali kepepet :). caranya :

masuk ke rootΒ 

su -
usermod -aG wheel namauser

Kalau lgsg bikin sejajar ya tinggal jalanin visudo dan copas otorisasi root, kemudian ganti root jadi user yang mau jadi sudoers. Sebetulnya sudo ini banyak settingnya, jadi tiap user yang dijadiin sudoers ini bisa diatur lagi privilegesnya, tapi ntar bahasan lain aja.

Securing SSHΒ 

ada 3 yang pasti ta ubah kalo setting server :

  1. root kaga boleh login
  2. ubah port ssh (standar 22, diubah terserah ke berapa)
  3. Menentukan user yang boleh melakukan ssh ke server

Ubah konfigurasi di /etc/ssh/sshd_config

Port 22 ke Port 2202 (atau terserah)
PermitRootLogin yes diubah ke no

AllowUsers namauser1 namauser2 dst

Kalau SELinuxnya nyala, konfigurasi di atas ini masi kurang, akan dibahas dibawah yang berhubungan sama SELinux

Firewall

secara default firewall di centos lgsg aktif dan kalo ga salah ngeblok semua. Untuk periksa status firewall, pake perintah

systemctl status firewalld

Ntar akan keluar statusnya

[detanto@namaserver ~]$ sudo systemctl status firewalld
● firewalld.service - firewalld - dynamic firewall daemon
   Loaded: loaded (/usr/lib/systemd/system/firewalld.service; enabled; vendor preset: enabled)
   Active: active (running) since Thu 2020-04-30 21:57:00 WIB; 5min ago
     Docs: man:firewalld(1)
 Main PID: 15906 (firewalld)
    Tasks: 2 (limit: 26213)
   Memory: 23.7M
   CGroup: /system.slice/firewalld.service
           └─15906 /usr/libexec/platform-python -s /usr/sbin/firewalld --nofork --nopid

Apr 30 21:57:00 namaserver systemd[1]: Stopped firewalld - dynamic firewall daemon.
Apr 30 21:57:00 namaserver systemd[1]: Starting firewalld - dynamic firewall daemon...
Apr 30 21:57:00 namaserver systemd[1]: Started firewalld - dynamic firewall daemon.

pas ngerubah port ssh yang diatas, jangan lupa allow port yang dipilih dengan perintah

firewall-cmd --add-port=portnya/tcp --permanent

trus restart firewallnya

systemctl restart firewalld

ini berlaku buat semua ya, bahkan port 80 tadi ditutup sama si firewall kampret ini

Install Apache

sudo yum install httpd
sudo firewall-cmd --permanent --add-service=http
sudo firewall-cmd --permanent --add-service=https
sudo firewall-cmd --reload

Start dan check

sudo systemctl start httpd
sudo systemctl status httpd

kalo jalan ntar muncul

● httpd.service - The Apache HTTP Server
   Loaded: loaded (/usr/lib/systemd/system/httpd.service; enabled; vendor preset: disabled)
  Drop-In: /usr/lib/systemd/system/httpd.service.d
           └─php-fpm.conf
   Active: active (running) since Thu 2020-04-30 21:55:48 WIB; 1h 2min ago
     Docs: man:httpd.service(8)
 Main PID: 9086 (httpd)
   Status: "Total requests: 17; Idle/Busy workers 100/0;Requests/sec: 0.00454; Bytes served/sec: 186 B/sec"
    Tasks: 278 (limit: 26213)
   Memory: 57.0M
   CGroup: /system.slice/httpd.service
           β”œβ”€ 9086 /usr/sbin/httpd -DFOREGROUND
           β”œβ”€ 9087 /usr/sbin/httpd -DFOREGROUND
           β”œβ”€ 9088 /usr/sbin/httpd -DFOREGROUND
           β”œβ”€ 9089 /usr/sbin/httpd -DFOREGROUND
           β”œβ”€ 9090 /usr/sbin/httpd -DFOREGROUND
           └─19291 /usr/sbin/httpd -DFOREGROUND

Apr 30 21:55:48 namaserver systemd[1]: Starting The Apache HTTP Server...
Apr 30 21:55:48 namaserver systemd[1]: Started The Apache HTTP Server.
Apr 30 21:55:48 namaserver httpd[9086]: Server configured, listening on: port 80

Setting Virtual Host

Buat folder sites-available dan sites-enabled di folder /etc/httpd (kalo di ubuntu apache2)

trus edit httpd.conf, tambahkanΒ 

IncludeOptional sites-enabled/*.conf

buat file namavirtualhost.conf di folder sites-available, yang isinya standarlah buat virtualhost

<VirtualHost>
ServerAdmin webmaster@dummy-host.example.com
    DocumentRoot "/var/www/namaapp"
    ServerName namaserver.detanto.net
    ServerAlias namaserver.detanto.net
    ErrorLog "logs/namaserver_error_log"
    CustomLog "logs/namaserver_access_log" common
<Directory "/var/www/namaapp/">
    Options Indexes FollowSymLinks
    AllowOverride All
    Order allow,deny
    Allow from all
</Directory>
</VirtualHost>

buat link di folder sites-enabled

sudo ln -s /etc/httpd/sites-available/namaapp.conf /etc/httpd/sites-enabled/namaapp.conf

Securing Apache

Directory Browsing

nah untuk ini penting banget, karena kalo boleh pengunjung akan bisa melihat dalam folder aplikasi web kita, kek gini.

Untuk nge-disable directory browsing di aplikasi kita, hilangkan Option Indexes di konfigurasi sites-available, sehingga jadi kek gini

<VirtualHost>
ServerAdmin webmaster@dummy-host.example.com
    DocumentRoot "/var/www/namaapp"
    ServerName namaserver.detanto.net
    ServerAlias namaserver.detanto.net
    ErrorLog "logs/namaserver_error_log"
    CustomLog "logs/namaserver_access_log" common
<Directory "/var/www/namaapp/">
    Options FollowSymLinks
    AllowOverride All
    Order allow,deny
    Allow from all
</Directory>
</VirtualHost>

ServerTokens Prod

Tambahkan opsi ini di httpd.conf, supaya gak keliatan versi OS Servernya, jadinya kek gini :

tapi tetep muncul web servernya pake apa, jadi harus dihilangkan semua

ServerSignature Off

Tambahkan opsi ini di httpd.conf, supaya ilang semua

TraceEnable Off

Kalo idup, pengunjung bisa nyolong informasi cookie web kita, karena boleh Cross Site Tracing

Sembunyiin Versi PHP

biar ga ketauan kita pake php versi berapa, bisa disetting di php.ini, untuk tau lokasi php.ini yang dipake

php -i | grep "Loaded Configuration File"

Kalo udah tau tinggal edit php.ini-nya, cari text expose_php, defaultnya on, dibikin off. Sebelum di offkan ntar kalo kita akses pake lynx (browser cli), hasilnya akan seperti ini

[root@namaserver ~]# lynx -head -mime_header http://alamatserver
HTTP/1.1 200 OK
Date: Sat, 02 May 2020 08:54:28 GMT
Server: Apache
X-Powered-By: PHP/7.3.17
Expires: Thu, 19 Nov 1981 08:52:00 GMT
Cache-Control: no-store, no-cache, must-revalidate
Pragma: no-cache
Set-Cookie: ci_session=2gm6ee0hieona2vnkq58dj7k8o2np0hm; expires=Sat, 02-May-2020 10:54:28 GMT; Max-Age=7200; path=/; HttpOnly
Connection: close
Content-Type: text/html; charset=UTF-8

Setelah dioffkan, hasilnya akan kek gini, X-powerednya ilang

[root@namaserver ~]# lynx -head -mime_header http://alamatserver
HTTP/1.1 200 OK
Date: Sat, 02 May 2020 08:55:49 GMT
Server: Apache
Expires: Thu, 19 Nov 1981 08:52:00 GMT
Cache-Control: no-store, no-cache, must-revalidate
Pragma: no-cache
Set-Cookie: ci_session=4vb2vkcpdnj9u88d2d4d9509pses88f6; expires=Sat, 02-May-2020 10:55:50 GMT; Max-Age=7200; path=/; HttpOnly
Connection: close
Content-Type: text/html; charset=UTF-8

SELinux Permission untuk Apache

check SELinux keinstall ndak

[root@namaserver perawatan_app]# rpm -qa | grep selinux
libselinux-2.9-2.1.el8.x86_64
python3-libselinux-2.9-2.1.el8.x86_64
selinux-policy-3.14.3-20.el8.noarch
container-selinux-2.124.0-1.module_el8.1.0+298+41f9343a.noarch
selinux-policy-targeted-3.14.3-20.el8.noarch
libselinux-devel-2.9-2.1.el8.x86_64
libselinux-utils-2.9-2.1.el8.x86_64
rpm-plugin-selinux-4.14.2-26.el8_1.x86_64

Kalo keluar kek gitu, brarti SELinux udah keinstall, trus check dulu status SELinuxnya

[root@namaserver www]# sestatus
SELinux status:                 disabled

Kalau tulisannya kek yang diatas, berarti disabled ato nggak aktif. Kalo mau aktifin, edit konfigurasi SELinuxnya yang ada di /etc/selinux/config. setiap level ada keterangannya seperti tulisan dibawah ini

# This file controls the state of SELinux on the system.
# SELINUX= can take one of these three values:
#     enforcing - SELinux security policy is enforced.
#     permissive - SELinux prints warnings instead of enforcing.
#     disabled - No SELinux policy is loaded.
SELINUX=disabled
# SELINUXTYPE= can take one of these three values:
#     targeted - Targeted processes are protected,
#     minimum - WModification of targeted policy. Only selected processes are protected.
#     mls - Multi Level Security protection.
SELINUXTYPE=targeted

Tinggal kita set sesuai kebutuhan kita. Kalo udah kita idupin, trus reboot servernya. abis itu kalo kita ketik sestatus munculnya kek gini

[root@namaserver ~]# sestatus
SELinux status:                 enabled
SELinuxfs mount:                /sys/fs/selinux
SELinux root directory:         /etc/selinux
Loaded policy name:             targeted
Current mode:                   permissive
Mode from config file:          permissive
Policy MLS status:              enabled
Policy deny_unknown status:     allowed
Memory protection checking:     actual (secure)
Max kernel policy version:      31

Untuk testing, tak saranin permissive dulu, jadi ntar tetep bisa diakses cuman akan muncul log-nya, cara liat lognya di

cat /var/log/messages | grep "SELinux is preventing"

Ntar akan muncul lognya, tak kasi sebagian ya

May  1 20:55:57 namaserver platform-python[1976]: SELinux is preventing /usr/sbin/sshd from name_bind access on the tcp_socket port 1122.
*****  Plugin bind_ports (92.2 confidence) suggests   ************************
If you want to allow /usr/sbin/sshd to bind to network port 1122
Then you need to modify the port type.
Do
semanage port -a -t PORT_TYPE -p tcp 1122
where PORT_TYPE is one of the following: ssh_port_t, vnc_port_t, xserver_port_t.
*****  Plugin catchall_boolean (7.83 confidence) suggests   ******************
If you want to allow nis to enabled
Then you must tell SELinux about this by enabling the 'nis_enabled' boolean.
Do
setsebool -P nis_enabled 1
*****  Plugin catchall (1.41 confidence) suggests   **************************
If you believe that sshd should be allowed name_bind access on the port 1122 tcp_socket by default.
Then you should report this as a bug.
You can generate a local policy module to allow this access.
Do
allow this access for now by executing:
ausearch -c 'sshd' --raw | audit2allow -M my-sshd
semodule -X 300 -i my-sshd.pp

Karena port ssh tadi diubah, makanya muncul log ini, jadi kita musti jalanin

semanage port -a -t ssh_port_t -p tcp 1122
setsebool -P nis_enabled 1
ausearch -c 'sshd' --raw | audit2allow -M my-sshd
semodule -X 300 -i my-sshd.pp

Jadi kalau permissive, dikasi tau semua tuh stepnya. Misal nih kita mau liat yang web, kita akses dulu webnya, trus kita liat lognya lag, akan muncul hasilnya kek gini:

May  1 22:18:58 namaserver setroubleshoot[20155]: SELinux is preventing /usr/sbin/php-fpm from name_connect access on the tcp_socket port 389. For complete SELinux messages run: sealert -l f26d0490-06e1-4932-8c5b-78df5f0aa9b0
May  1 22:18:58 namaserver platform-python[20155]: SELinux is preventing /usr/sbin/php-fpm from name_connect access on the tcp_socket port 389.
*****  Plugin catchall_boolean (24.7 confidence) suggests   ******************

If you want to allow httpd to can network connect
Then you must tell SELinux about this by enabling the 'httpd_can_network_connect' boolean.

Do
setsebool -P httpd_can_network_connect 1

*****  Plugin catchall_boolean (24.7 confidence) suggests   ******************

If you want to allow httpd to can connect ldap
Then you must tell SELinux about this by enabling the 'httpd_can_connect_ldap' boolean.

Do
setsebool -P httpd_can_connect_ldap 1

*****  Plugin catchall_boolean (24.7 confidence) suggests   ******************

If you want to allow authlogin to nsswitch use ldap
Then you must tell SELinux about this by enabling the 'authlogin_nsswitch_use_ldap' boolean.

Do
setsebool -P authlogin_nsswitch_use_ldap 1

*****  Plugin catchall_boolean (24.7 confidence) suggests   ******************

If you want to allow nis to enabled
Then you must tell SELinux about this by enabling the 'nis_enabled' boolean.

Do
setsebool -P nis_enabled 1

*****  Plugin catchall (3.53 confidence) suggests   **************************

If you believe that php-fpm should be allowed name_connect access on the port 389 tcp_socket by default.
Then you should report this as a bug.
You can generate a local policy module to allow this access.
Do
allow this access for now by executing:
# ausearch -c 'php-fpm' --raw | audit2allow -M my-phpfpm
# semodule -X 300 -i my-phpfpm.pp

Jadi setting SELinuxnya musti dibenerin satu2. mati ga lo? kita musti liat daftar policy yang berhubungan sama urusan web, caranya :

[root@perawatan perawatan_app]# getsebool -a | grep httpd
httpd_anon_write --> off
httpd_builtin_scripting --> on
httpd_can_check_spam --> off
httpd_can_connect_ftp --> off
httpd_can_connect_ldap --> off
httpd_can_connect_mythtv --> off
httpd_can_connect_zabbix --> off
httpd_can_network_connect --> off
httpd_can_network_connect_cobbler --> off
httpd_can_network_connect_db --> off httpd_can_network_memcache --> off httpd_can_network_relay --> off httpd_can_sendmail --> off httpd_dbus_avahi --> off httpd_dbus_sssd --> off httpd_dontaudit_search_dirs --> off httpd_enable_cgi --> on httpd_enable_ftp_server --> off httpd_enable_homedirs --> off httpd_execmem --> off httpd_graceful_shutdown --> off httpd_manage_ipa --> off httpd_mod_auth_ntlm_winbind --> off httpd_mod_auth_pam --> off httpd_read_user_content --> off httpd_run_ipa --> off httpd_run_preupgrade --> off httpd_run_stickshift --> off httpd_serve_cobbler_files --> off httpd_setrlimit --> off httpd_ssi_exec --> off httpd_sys_script_anon_write --> off httpd_tmp_exec --> off httpd_tty_comm --> off httpd_unified --> on httpd_use_cifs --> off httpd_use_fusefs --> off httpd_use_gpg --> off httpd_use_nfs --> off httpd_use_openstack --> off httpd_use_sasl --> off httpd_verify_dns --> off

Sesuai dengan yang di log tadi, beberapa harus kita buka; yaitu

setsebool -P httpd_can_connect_ldap 1
setsebool -P httpd_can_network_connect 1
setsebool -P httpd_can_network_connect_db 1
setsebool -P authlogin_nsswitch_use_ldap 1
setsebool -P nis_enabled 1

Habis itu kita liat log lagi, kalo udah bener settingnya, harusnya ga akan muncul lg di /var/log/messages

setelah yakin baru kita set SELinuxnya enforcing bukan permissive lagi, trus reboot. selesai dah

Masi ada materi lain si, ntar ta bahas lagi

semoga bisa membantu yg lg setting Centos ato yang lain, Thx!

Install Koneksi PHP untuk MS SQL Server di CENTOS 8

Sebetulnya untuk instalasi sqlsrv bisa dilihat di webnya microsoft tapi gak papa, tak tambahin disini aja buat catatan

Install ODBC Driver

ini buat centos 8 ya, dan ambilnya dari rhel8
curl https://packages.microsoft.com/config/rhel/8/prod.repo > /etc/yum.repos.d/mssql-release.repo

exit
sudo yum remove unixODBC-utf16 unixODBC-utf16-devel #to avoid conflicts
sudo ACCEPT_EULA=Y yum install msodbcsql17

# cuman buat koneksi via CLI

sudo ACCEPT_EULA=Y yum install mssql-tools
echo 'export PATH="$PATH:/opt/mssql-tools/bin"' >> ~/.bash_profile
echo 'export PATH="$PATH:/opt/mssql-tools/bin"' >> ~/.bashrc
source ~/.bashrc

sudo yum install unixODBC-devel

Install prequsites sebelum install sqlsrv

dnf install php-xml php-pdo php-pear php-devel

Di gw muncul error pada saat install php-devel padahal sebelumnya di Centos 7 kaga. Jadi kalao install di Centos 8 harus jalankan perintah ini dulu:

dnf config-manager --set-enabled PowerTools

baru jalankan yum install php-devel. dan kebetulan error ahahhahaha, ternyata diblock outbound 80 dari servernya, ta matiin dulu firewallnya, males bikin commandnya

systemctl stop firewalld

Install sqlsrv

pecl install sqlsrv
pecl install pdo_sqlsrv

kondisi firewall dan SELinux mati ya, kalau idup ya musti disetting dulu koneksinya yg dibolehkan

setelah selesai, bikin koneksi sederhana pake php trus jalankan

$hostname = 'namaserver'; 
$username = 'namauser'; 
$password = 'katasandi'; 
$database = 'namadatabase'; 

$serverName = $hostname; 

$connectionOptions = array(
    "database" => $database,
    "uid" => $username,
    "pwd" => $password
);

// Establishes the connection
$conn = sqlsrv_connect($serverName, $connectionOptions);
if ($conn === false) {
    die(formatErrors(sqlsrv_errors()));
}

// Select Query
$tsql = "SELECT @@Version AS SQL_VERSION";

// Executes the query
$stmt = sqlsrv_query($conn, $tsql);

// Error handling
if ($stmt === false) {
    die(formatErrors(sqlsrv_errors()));
}

dannnn ga jalan, muter2 mulu. Bingunglah gw, gw cobain koneksi pake cli dengan command :

sqlcmd -S namaserver -U namauser -P password -d namadatabase -Q "select * from tablenya" 

dan hasilnya tetep ga bisa

Sqlcmd: Error: Microsoft ODBC Driver 17 for SQL Server : SSL Provider: [error:1425F102:SSL routines:ssl_choose_client_version:unsupported protocol].
Sqlcmd: Error: Microsoft ODBC Driver 17 for SQL Server : Client unable to establish connection.

Untungnya, kalo di CLI jelas terpampang errornya, tadi sempet gw state; ga jalan muter2 mulu. itu masih mending. kalau di Codeigniter, dia ga bisa return object hasil query! kan bangke, kaga muncul error detailnya, cuman muncul :

Message: Call to a member function num_rows() on bool

kampret bener, gugling sampe bego jawabannya macem2: salah querylah, tablenya ga ada lah, dan jawaban2 lain yang tidak menyelesaikan!

Dari error di cli, gw ambil kesimpulan konfigurasi SQL Servernya yang dodol, dia masih pake TLS1.0 (untung pernah dibahas di docker, jadi bisa memperkirakan errornya dan ngerti keywordnya apa. coba kalo belum juga pusing itu).

Nah kalo ubuntu gampang, konfigurasi adanya di /etc/ssl/openssl.conf, di Centos ini bangke banget! di folder /etc/ssl isinya cuman link ke folder /etc/pki/certs kalo ga salah dan konfigurasi openssl ada di folder /etc/pki/tls. Sialnya isi konfigurasi beda sama yang di ubuntu. kupret banget!

Akhirnya brosang brosing kesana kemari, nemu web bahasa jepang yang gw juga ngeraba artinya. Jadi di Centos 8 ini secara default crypto-policiesnya make yang baru (kemungkinan TLS2.0). Di dalam folder /etc/crypto-policies ada file config (jangan nanya nemunya gimana, gw juga lupa), di file itu ada statement gini:

* LEGACY: Ensures maximum compatibility with legacy systems (64-bit security)
* DEFAULT: A reasonable default for today's standards (112-bit security).

tuh kan bener! dia pake today standards, sementara SQL Server disana koneksi sslnya jadul. Akhirnya gw edit file config di dalam /etc/crypto-policies, dari value awal DEFAULT gw ubah ke LEGACY. kemudian jalankan command

[root@namaserver ~]# update-crypto-policies
Setting system policy to LEGACY
Note: System-wide crypto policies are applied on application start-up.
It is recommended to restart the system for the change of policies
to fully take place.

Restart dan langsung berhasil koneksinya ke SQL Server!!

Semoga bisa membantu yang kesulitan kek gw tadi, terima kasih

Lupa Password PostgreSQL

untuk merubah, kita harus edit file pg_hba.conf, kita ubah

host all all 127.0.0.1/32 md5

dari md5 ke trust, sehingga menjadi

host all all 127.0.0.1/32 trust

kemudian kita restart servicenya

/etc/init.d/postgresql restart

Kemudian masuk ke console postgre dengan terlebih dahulu masuk sebagai user postgres

su - postgres

kemudian konek ke databasenya

psql -h localhost -U postgres

dan kemudian ubah passwordnya

ALTER USER postgres PASSWORD 'pwdbaru';

setelah selesai, akan muncul konfirmasi

ALTER ROLE

Setelah itu, ubah lagi pg_hba.conf menjadi md5 dan restart service postgrenya. done!

Error Subversion : Could not use external editor to fetch log message

Error diatas muncul pada saat mau commit di mac gw dari terminal.

svn: E205007: Could not use external editor to fetch log message; consider setting the $SVN_EDITOR environment variable or using the –message (-m) or –file (-F) options
svn: E205007: None of the environment variables SVN_EDITOR, VISUAL or EDITOR are set, and no β€˜editor-cmd’ run-time configuration option was found

Solusinya adalah dengan masuk ke terminal trus ketik :

export SVN_EDITOR=vi

dah gitu aja

Install Apache, PHP, sqlsrv di OSX Mojave

Males install XAMPP karena gede banget, akhirnya berkeputusan install semi-manual apache di Mojave gw, karena mac gw habis dibabat alias reinstall ulang. mau restore timemachine tapi ga bisa karena timemachineku yang dulu pake APFS yang case-sensitive, sementara utk yg baru ini gw mau install OneDrive(dibahas di blog lain).

Berikut step by step instalasinya

Instalasi XCode Command Line Tools
xcode-select --install

Operation Not Permitted di Terminal
Secara default, setelah instalasi osx kita tidak bisa melakukakn aktivitas administrasi maupun akses ke folder admin melalui terminal. cara enablenya :

  1. Buka System Preferences
  2. Pilih Security & Privacy
  3. Pilih tab Privacy
  4. dari menu sebelah kiri pilih Full Disk Access
  5. klik tanda plus, cari aplikasi terminal kemudian pilih
  6. tutup, dan relaunch aplikasi terminal

Instalasi Homebrew
Kalo Homebrew belum diinstall, jalankan :
ruby -e "$(curl -fsSL https://raw.githubusercontent.com/Homebrew/install/master/install)"

Ikuti aja petunjuk yang di terminal, dan masukkan password kalau dibutuhkan. setelah instalasi selesai, check versi brew :
brew --version

Kalau di saya tampilnya
Homebrew 2.0.1
Homebrew/homebrew-core (git revision 6ffb; last commit 2019-02-16)

Library yang dibutuhkan sama mojave :
brew install openldap libiconv

Instalasi Apache
brew install httpd

Setelah selesai, start service dan test :
1. di browser anda dengan mengetik http://localhost:8080, sebagai catatan, default port untuk instalasi ini adalah 8080. jadi untuk testingnya harus pake port
2. liat servicenya jalan ga
ps ax | grep httpd

Seperti yang lain, untuk start/stop/restart gunakan perintah :
sudo apachectl start
sudo apachectl stop
sudo apachectl -k restart

Konfigurasi Apache

Letak konfigurasi apache ada di

/usr/local/etc/httpd/httpd.conf

untuk editnya, terserah mau pake apa, kalo gw udah kebiasaan pake VI

Ubah Port (8080 ke 80)
Cari Listen 8080, ganti ke Listen 80

DocumentRoot
Ganti lokasi documentroot ke folder favorit anda

Enable Rewrite
Karena gw pake CI dan kebetulan butuh untuk rewrite via htaccess, cari mod_rewrite.so dan lepas tanda pagar (#)

User & Groups
Ubah ke user kita, group staff

Servername
Dari pengalaman, kalau nama macbook kita agak aneh, kadang jadi error/warning pas restart apache via terminal. Makanya harus kita ubah nama komputer kita

Ubah Nama Mac

  1. Buka System Preferences
  2. Klik Sharing
  3. Klik Computer Name, pilih dan kemudian masukkan nama baru
  4. done

Instalasi PHP
Instalasi di brew, kita bisa milih versi phpnya, tapi yg disupport tanpa embel2 instalasi lainnya itu php 7.1 ke atas. kalo mau pilih php yg lebih tua harus tambah library untuk yg udah deprecated
Saran gw, mending ke 7+ biar lebih update. nah untuk instalasi sqlsrv, dari pengalaman gw gbs yang 7.1 keatas, sempat install 7.3, tapi malah pas instalasi driver sqlsrvnya error ga jelas yg ngehabisin waktu. Instalasi PHP 7.1 :
brew install php@7.1

setelah selesai, check versinya
php -v
PHP 7.1.25 (cli) (built: Dec 7 2018 08:20:45) ( NTS )
Copyright (c) 1997-2018 The PHP Group
Zend Engine v3.1.0, Copyright (c) 1998-2018 Zend Technologies
with Zend OPcache v7.1.25, Copyright (c) 1999-2018, by Zend Technologies

Konfigurasi PHP
Enable lib phpnya di httpd.conf (lokasi ada diatas)
LoadModule php7_module /usr/local/opt/php@7.1/lib/httpd/modules/libphp7.so

Konfigurasi Lain di httpd.confg

DirectoryIndex index.php index.html

SetHandler application/x-httpd-php

Konfigurasi Lain di php.ini (lokasi /usr/local/etc/php/7.1)

short_open_tag=On

Udah selesai? restart service dan check pake script
phpinfo();

Instalasi sqlsrv untuk connect ke Microsoft SQL Server
Versi lengkapnya ada di sini

Install Library yg dibutuhkan
brew install autoconf automake libtool

Install Drivernya
sudo pecl install sqlsrv
sudo pecl install pdo_sqlsrv

Setelah itu restart apache
done

testing konektivitas sql server dengan melihat info.php yang tadi kita buat, search mssql, kalau ada brarti udah terinstall dengan sukses. test juga dengan script ini

$serverName = "10.211.55.3";
$connectionOptions = array(
"database" => "namadatabase",
"uid" => "sa",
"pwd" => "passwordnya"
);
// Establishes the connection
$conn = sqlsrv_connect($serverName, $connectionOptions);
if ($conn === false) {
die(formatErrors(sqlsrv_errors()));
}
sqlsrv_free_stmt($stmt);
sqlsrv_close($conn);
function formatErrors($errors)
{
// Display errors
echo "Error information:
";
foreach ($errors as $error) {
echo "SQLSTATE: ". $error['SQLSTATE'] . "
";
echo "Code: ". $error['code'] . "
";
echo "Message: ". $error['message'] . "
";
}
}

PHP – Microsoft SQL Server on OSX (El Capitan)

Kemarin sore, gw memutuskan untuk install El-Capitan secara fresh copy di macbook gw setelah sebelumnya cuman ngupdate biasa. Semua lancar, tapi setelah install XAMPP (5.6.15 / PHP 5.6.15) perasaan mulai nggak enak. eh ternyata bener, mac gw kaga bisa konek ke Microsoft SQL Server. “Call to undefined function mssql_connect()” katanya. Mampus deh! Ternyata emang XAMPP keknya udah ga support koneksi ini, setelah menghabiskan waktu sekitar 3 jam untuk baca2 di paman gugel, akhirnya nemu link penyelamat gw http://lkrms.org/php-with-freetds-on-os-x-mavericks/

Intinya,kita harus compile dan rebuild mssql.so dari freetds, setelah jadi, mssql.so tersebut kita copy ke lokasi extension php di komputer kita (di komputer gw : /usr/lib/php/extensions/no-debug-non-zts-20121212/). kemudian kita enable mssql.so di php.ini (/Applications/XAMPP/xamppfiles/etc/). Restart XAMPP dan selesai sudah koneksinya.

di link itu dijelaskan detail cara compile semuanya, tapi gw memutuskan untuk langsung bypass download mssql.so, pas pake yosemite pernah nyobain dan seinget gw cukup ribet karena musti install xcode, homebrew, dkk

Untuk El Capitan ada treatment khusus karena di El Capitan ada fitur security yang namanya “Rootless” jadi ga bisa ngop mssql.so ke folder extension-nya php. Supaya bisa ngopi, caranya gini :

  1. Restart Mac
  2. Pencet Command-R sebelum logo apple kroak muncul (masuk ke recovery mode)
  3. Sorot menu yang di atas, klik utilites kemudian terminal
  4. di terminal, ketik “csrutil disable” : nanti akan keluar konfirmasi sukses dan dipersilahkan untuk restart mac
  5. Restart Mac lagi
  6. copy mssql.so ke folder extension
  7. balikin lagi safety mode dengan melakukan step 1-3, cuman commandnya diganti “csrutil enable”
  8. Restart lagi deh

Salute untuk mas luke arms, semua kredit merupakan haknya beliau, secara gw cuman copas sama nambahin sikit2, thx mas luke, kalo ente tinggalnya deket gw bayarin teh anget sama gorengan deh! πŸ™‚

install ffmpeg di redhat 6.5

dari gugel dapet link ini, nah disitu disebutkan bahwa apabila melakukan

yum install ffmpeg

dan gagal alias gak nemu, maka musti nambahin dag.repo di /etc/yum.repos.d yang isinya :

[dag]
name=Dag RPM Repository for Red Hat Enterprise Linux
baseurl=http://apt.sw.be/redhat/el$releasever/en/$basearch/dag
gpgcheck=1
gpgkey=http://dag.wieers.com/packages/RPM-GPG-KEY.dag.txt
enabled=1
protect=0

Kemudian baru yum install lagi. sialnya pasti dapat error yang bilang bahwa server itu kaga ada, kupret kan?

http://apt.sw.be/redhat/el6Server/en/x86_64/dag/repodata/repomd.xml: [Errno 14] PYCURL ERROR 22 - "The requested URL returned error: 404 Not Found"
Trying other mirror.

setelah gw cek ke alamat repo-nya, ternyata emang ga ada, permasalahan ada di statement el$releasever di file dag.repo yang ada di bagian baseurl, karena statement ini akan menghasilkan : el6Server. cara ngakalinnya adalah dengan mengganti el$releasever ke el6 saja, karena emang di servernya cuman itu isinya, statement baseurl menjadi seperti di bawah ini :

baseurl=http://apt.sw.be/redhat/el6/en/x86_64/dag/

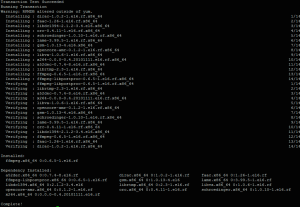
setelah selesai edit, jalanin lagi yum install ffmpeg, dijamin error lagi karena dia butuh dependencies ke libcppunit, cari ke rpm.pbone.net untuk cppunit yang sesuai dengan versi server redhatnya, gw dapet di sini. donlod, install pake rpm -ivh, jalanin lagi yum install ffmpeg, dijamin lancar jaya!

Screen Shot 2014-09-07 at 11.34.40 PM

semoga bisa membantu..

lupa (tidak tahu tepatnya) password red hat linux 6.1

ada server kawan (lokasi dirahasiakan) yang pas implementasi vendornya dogol semua, termasuk kawan gw :). disitu ada server2 gajah yang harganya menggiurkan tapi overkill, karena hanya untuk nge-host klien yang sedikit dengan aplikasi ecek2 berbasis php :P. nah masalahnya, password root pada kaga tau, termasuk administrator, bahkan yg install juga lupa. Begini caranya nge-resetnya :

  1. reboot server
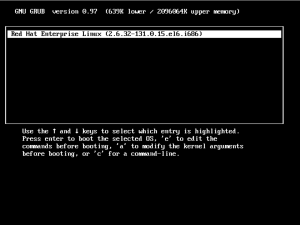
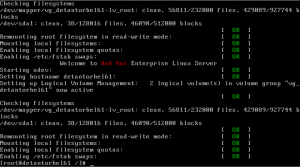
  2. pada saat ada tampilan pilihan boot tekan panah samping atau tombol esc. Nanti akan muncul daftar kernel yang ada seperti pada gambar ini :

    Screen Shot 2014-09-06 at 1.36.36 PM
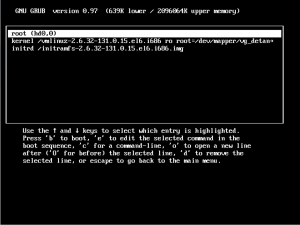
  3. pilih kernel-nya, trus ketik e (untuk edit) hingga muncul tampilan seperti gambar dibawah ini
    Screen Shot 2014-09-06 at 1.39.24 PM
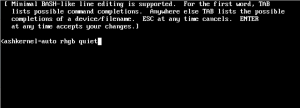
  4. Pilih yang ada vmlinuz-nya, terus ketik e (untuk edit) hingga muncul tampilan seperti gambar dibawah ini :
    Screen Shot 2014-09-06 at 1.41.44 PM
  5. trus ketik single atau init 1, tekan enter, nanti akan muncul seperti di gambar yg di point 3. pilih yg vmlinuz tadi trus sekarang ketik b (untuk boot). Server akan masuk ke single mode seperti gambar di bawah ini :
    Screen Shot 2014-09-06 at 1.45.13 PM
  6. ketik passwd, system akan menanyakan password baru. masukkan password baru, restart, login pake password yang tadi kita buat. selesai dah!
    Screen Shot 2014-09-06 at 1.49.00 PM

Disable Autostart MySQL service di Maverick

instalasi MySQL yang dari community menyisakan sesuatu yg nyesek, yaitu autostart yang makan memori banyak padahal jarang dipake. Gw jg ga tau kenapa, biasanya semua script yang di startup ditaruh di launchd. Tapi untuk mysql ini kagak πŸ™‚

Startup script ini adanya di /Library/StartupItems/MySQLCOM/MySQLCOM. Pengecekan dijalankan atau tidak ada di setting hostconfig yang ada di /etc. Isinya kek gini :
AFPSERVER=-NO-
AUTHSERVER=-NO-
TIMESYNC=-NO-
QTSSERVER=-NO-
MYSQLCOM=-YES-

Kalau mau dibikin ga otomatis, tinggal diganti aja value YES-nya, nanti pas restart pasti langsung modar.

Nah, kalau mau startnya gimana? tinggal ketik di terminal :

sudo /usr/local/namafoldermysql/support-files/mysql.server start

matiin? ya tinggal start diganti stop, restart? ya tinggal start diganti restart, gitu aja kok repot πŸ™‚